


Intro.: The Quest for Free Unlimited Sub-Domains
The concept of free unlimited sub-domains is not just a dream; it’s a reality that can significantly enhance your digital footprint. Imagine having the ability to create multiple sub-domains under your primary domain, each serving a unique purpose, without any additional financial burden. This capability can be a game-changer for businesses, bloggers, and digital marketers alike.
According to the ever-evolving digital landscape, content creators and website owners are constantly on the lookout for innovative ways to expand their online presence without incurring additional costs. One of the most sought-after solutions is the ability to obtain unlimited sub-domains for free. This article delves into how you can achieve this, addressing a myriad of questions that many in the digital space frequently ask.
Meeting the Requirements
Before diving into the process, it’s essential to understand the prerequisites for obtaining these sub-domains at no cost. There are two primary pathways:
- Paid Web Hosting: Many paid web hosting services offer unlimited sub-domains as part of their package. This option is ideal for those who already have a hosting plan and want to maximize its potential.
- Free Web Hosting with A Record Support: If you’re not ready to invest in paid hosting, free web hosting services that support A records can be a viable alternative. By connecting these with a sub-domain supplier, you can enjoy the benefits of unlimited sub-domains. For detailed guidance on How to get Free Web Hosting with “A” Record Support , refer to our previous article. [ From Here ]
Please note that the method described involves creating multiple accounts on the website listed below. Each account provides 5 free subdomain names. By creating numerous accounts, one could potentially obtain an unlimited number of free subdomains.
InSteps Guidelines:
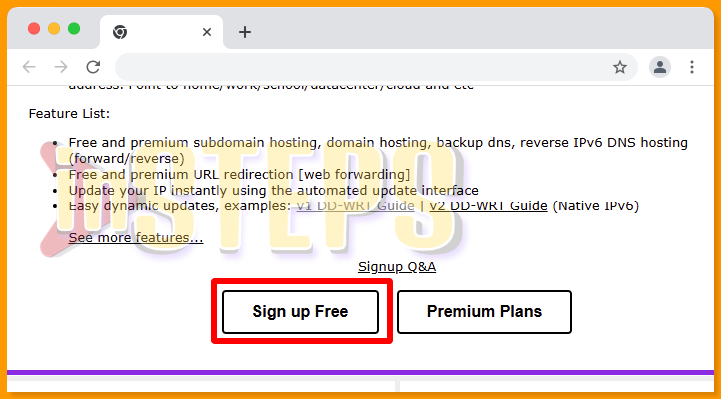
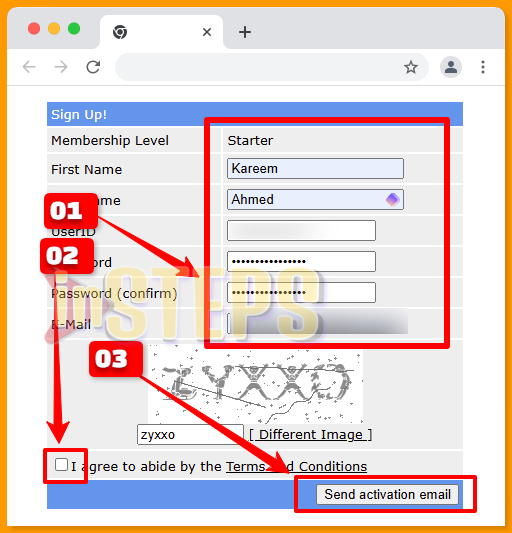
Step 01: Create a Free Account
Begin by signing up for a free account using the link provided [ Click here To Sign Up Free ] , as illustrated in the screenshot below.
Step 02: Activate Your Account
Confirm your registration by clicking the activation link sent to your email.
Step 03: Log In
Access your account again by logging in through the provided link. [ Click here to sign in ]
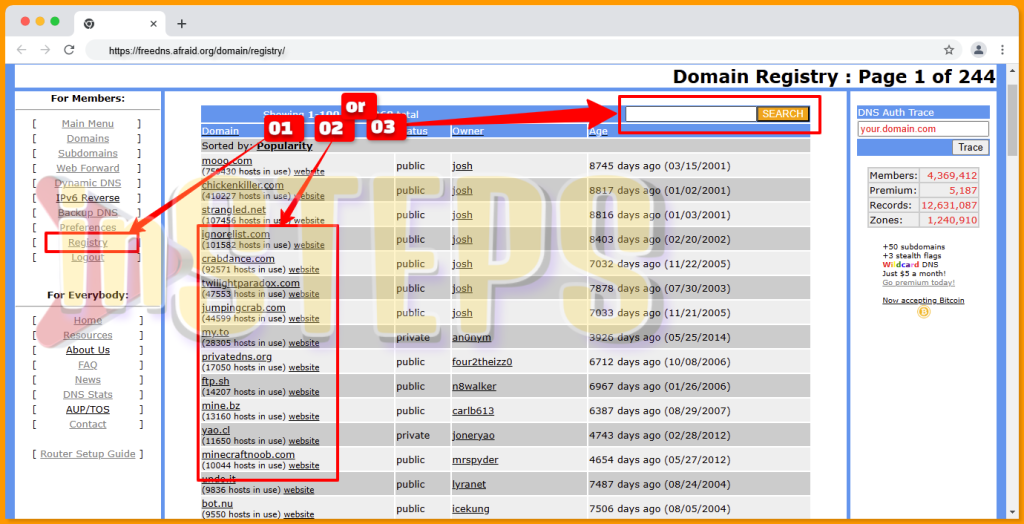
Step 04: Domain Registration
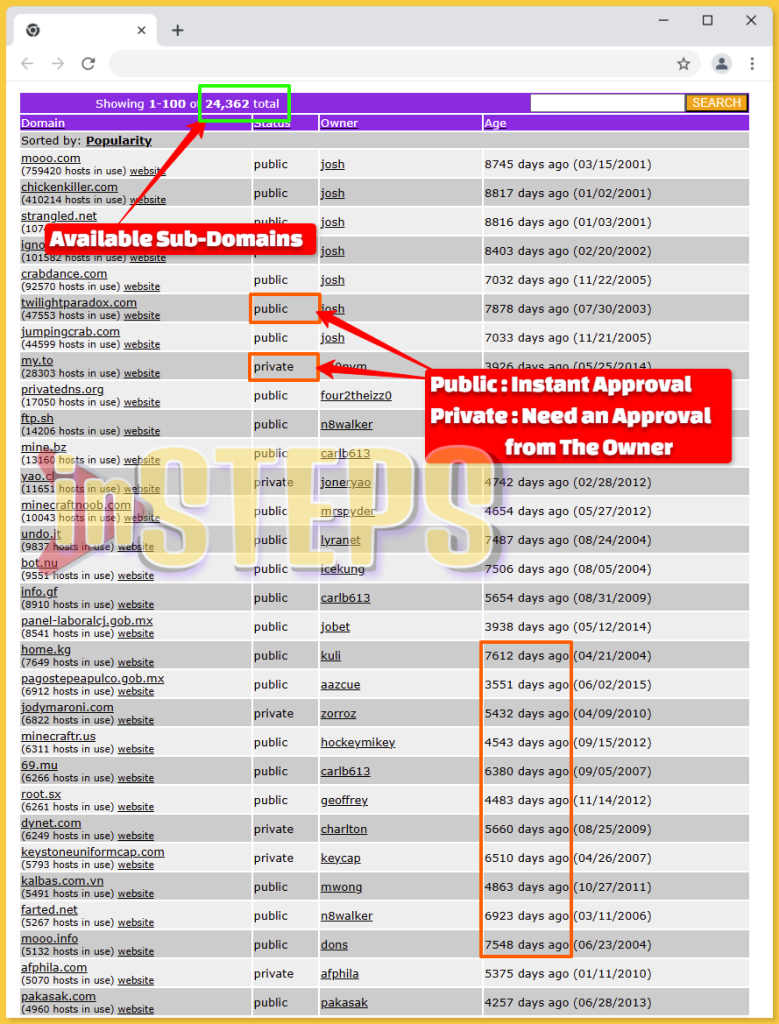
- Navigate to the registry section, as shown in Screenshot Tag#01.
- Choose from one of the 24,358 available domains (Tag#02) or use the search function to find a specific domain name (Tag#03).
Note:
As depicted in the screenshot, domains have two statuses:
- Public: Available for instant approval.
- Private: Requires approval from the domain owner.
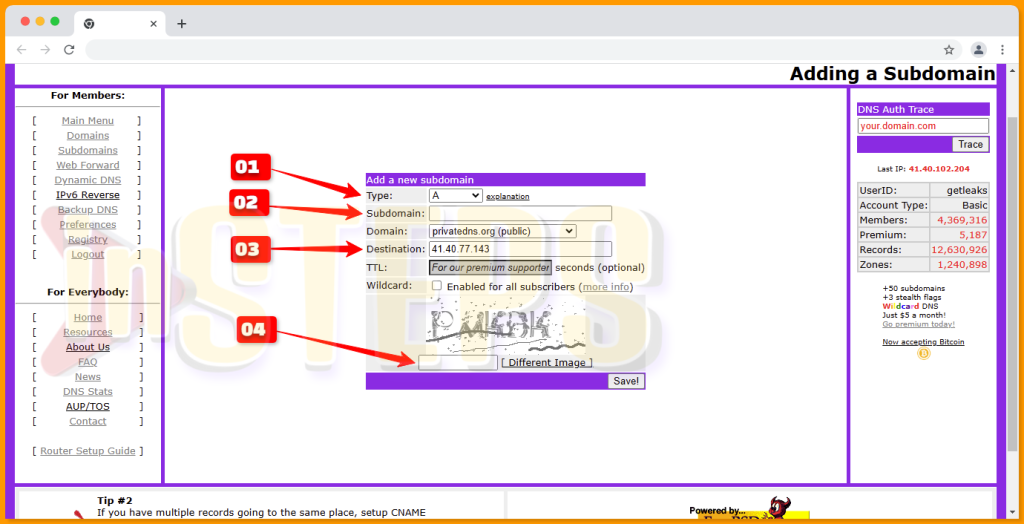
Step 05: Add Your Subdomain
Follow the steps in the screenshot to complete the process:
- Tag#01: Select the connection type with your web hosting provider.
- Tag#02: Enter your desired subdomain.
- Tag#03: Provide your web hosting IP address.
- Tag#04: Complete the captcha verification.
Key Note on Connection Types
There are various types of connections available. Currently, the “A” record is the only connection type that is operational without additional approval. If you wish to use other connection types, you will need to obtain approval from the administrator by sending an email request. The screenshot below provides a detailed overview of all connection types along with their descriptions.
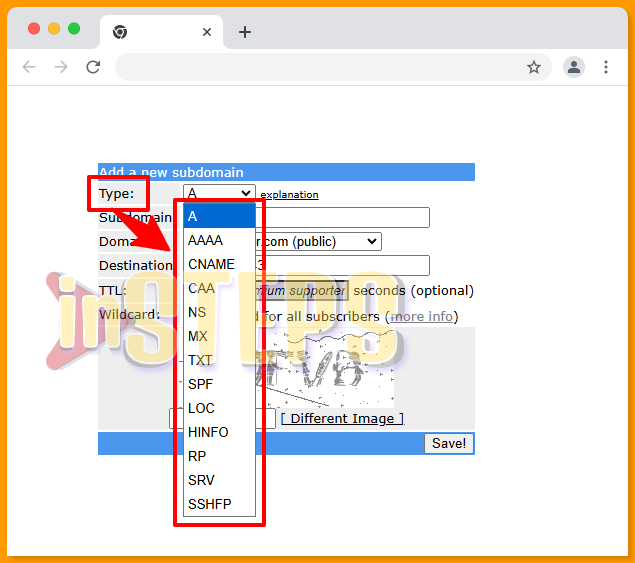
Here is a detailed explanation of the various connection types available for configuring your subdomain:
- Type: A
- Purpose: Directly points
subdomain.domain.comto a specific IP address. - Advantages: This is the most straightforward option. Any changes made in the FreeDNS program are immediately reflected on the internet. Note that cached queries on your computer may delay visible changes.
- Purpose: Directly points
- Type: MX
- Purpose: Directs
subdomain.domain.comto a mail server. - Advantages: Essential for routing emails to a different location. MX records can coexist with A records and are prioritized by mail servers for email delivery.
- Purpose: Directs
- Type: AAAA
- Purpose: Points
subdomain.domain.comto an IPv6 address. - Advantages: Ideal for users utilizing IPv6 networks or those with IPv4 to IPv6 tunnels.
- Purpose: Points
- Type: CNAME
- Purpose: Redirects
subdomain.domain.comto another hostname. - Advantages: Useful for integrating with other dynamic DNS services. The CNAME record points to another host, directing traffic to the IP address of the CNAMEd host.
- Purpose: Redirects
- Type: NS
- Purpose: Points
subdomain.domain.comto another nameserver. - Advantages: Delegates the FreeDNS host to another DNS server. This requires configuration on the destination nameserver to resolve the subdomain.
- Purpose: Points
- Type: TXT
- Purpose: Creates TXT records for various uses, such as DKIM for email verification.
- Advantages: Helps combat spam by allowing receiving mail servers to verify emails through a published cryptographic signature.
- Type: SPF
- Purpose: An anti-spam record for domains sending emails.
- Advantages: Enhances email security. More details can be found at SPF Wizard.
- Type: LOC
- Purpose: Expresses location information in the DNS.
- Advantages: Useful for geographic data. Refer to RFC1876 for a complete explanation.
- Type: RP
- Purpose: Specifies the responsible person for a domain.
- Format:
RP <mbox-dname> <txt-dname>, where both fields are required. - Advantages: Provides contact information for domain management. See RFC1183 for details.
- Type: SRV
- Purpose: A service record used by protocols like SIP and XMPP, and applications like Minecraft.
- Format:
Subdomain: _service._protocol.subdomain,Destination: Priority Weight Port Target. - Examples:
_minecraft._tcp.mc.yourdomain.comwith destination0 0 25676 dns.yourdomain.com_jabber._tcp.yourdomain.comwith destination10 0 5269 jabber.yourdomain.com
Each connection type serves a specific purpose and should be selected based on your specific needs and network configuration.


